Hiking boot sole coming off – What you can do about it
Updated on
- Why do hiking boot soles come off?
- How can you prevent sole separation?
- How to recognise hydrolysis
- Emergency repairs on the move
- Resoling hiking boots
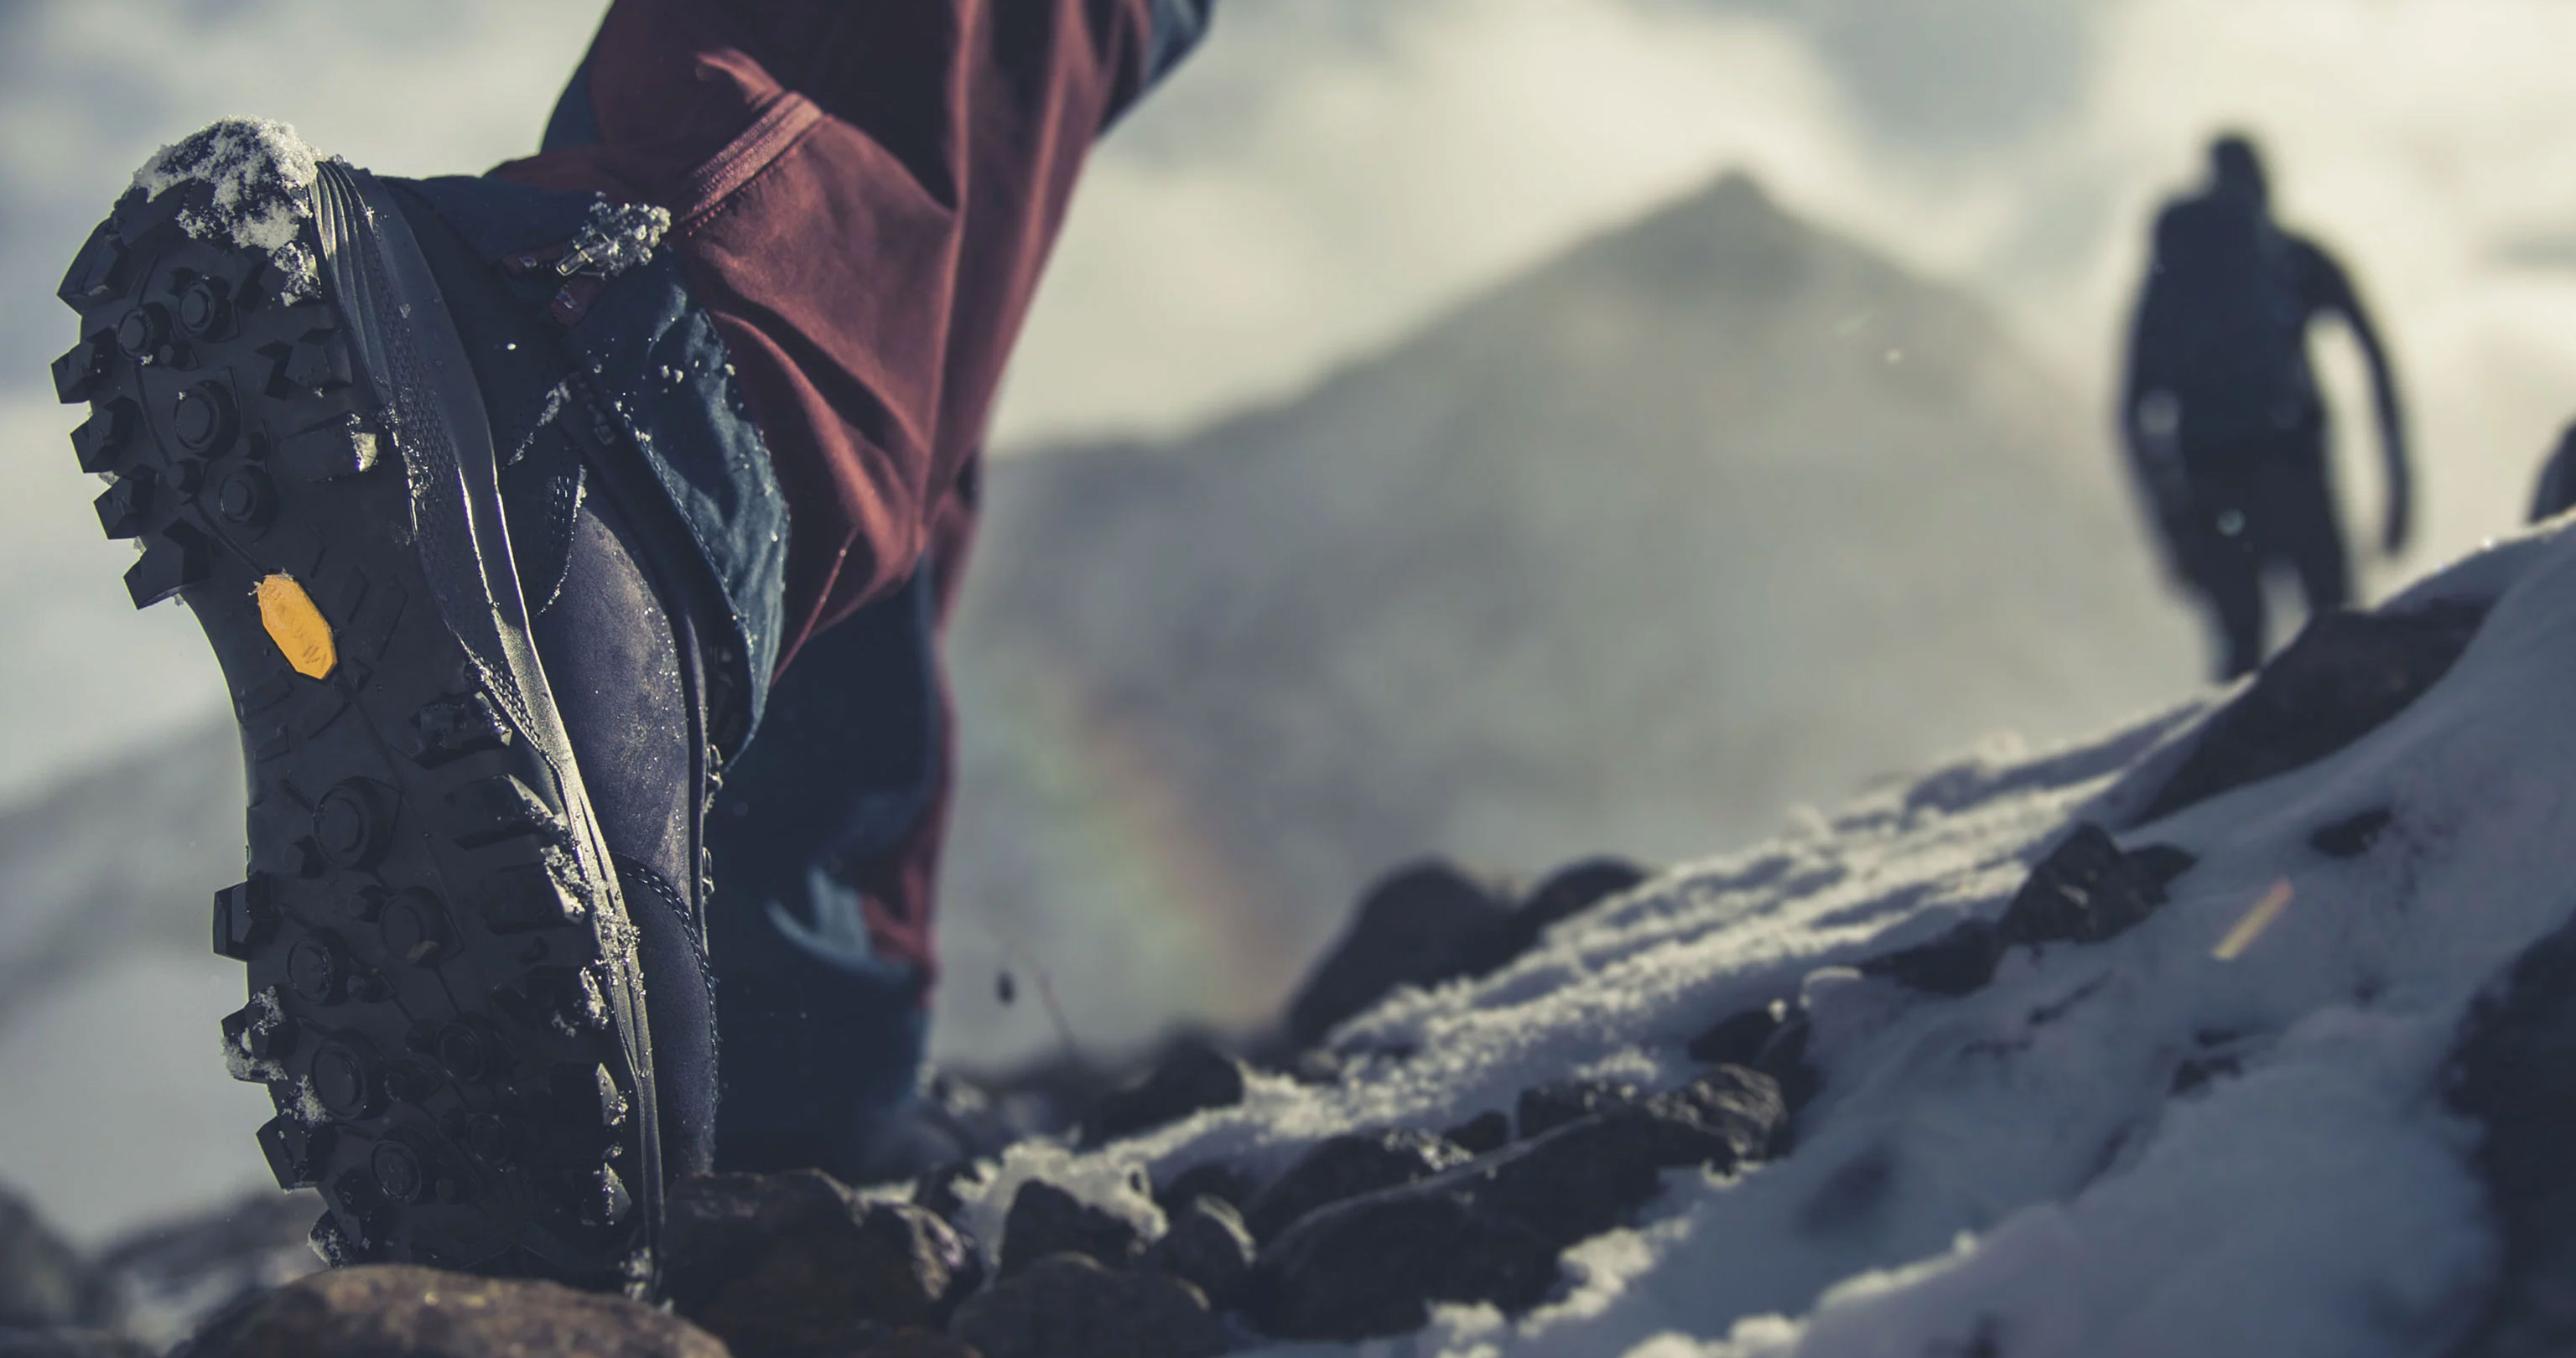
If your shoe sole came off in the middle of a hiking tour or a long trekking trip, not only would this be intensely annoying, it could also be dangerous. It’s not easy to know what to do in such a situation, yet it happens time after time. The problem is due to the natural ageing of materials and it can happen to our boots too.
As boot manufacturers, we naturally want you to be able to enjoy hiking in comfort, free from frustration. This is why we are answering the most important questions about this issue.
Expertise and know-how for your outdoor adventures – welcome to the HANWAG BOOTCAMP. Watch the how-to videos on our YouTube channel.
1 Why do hiking boot soles come off?
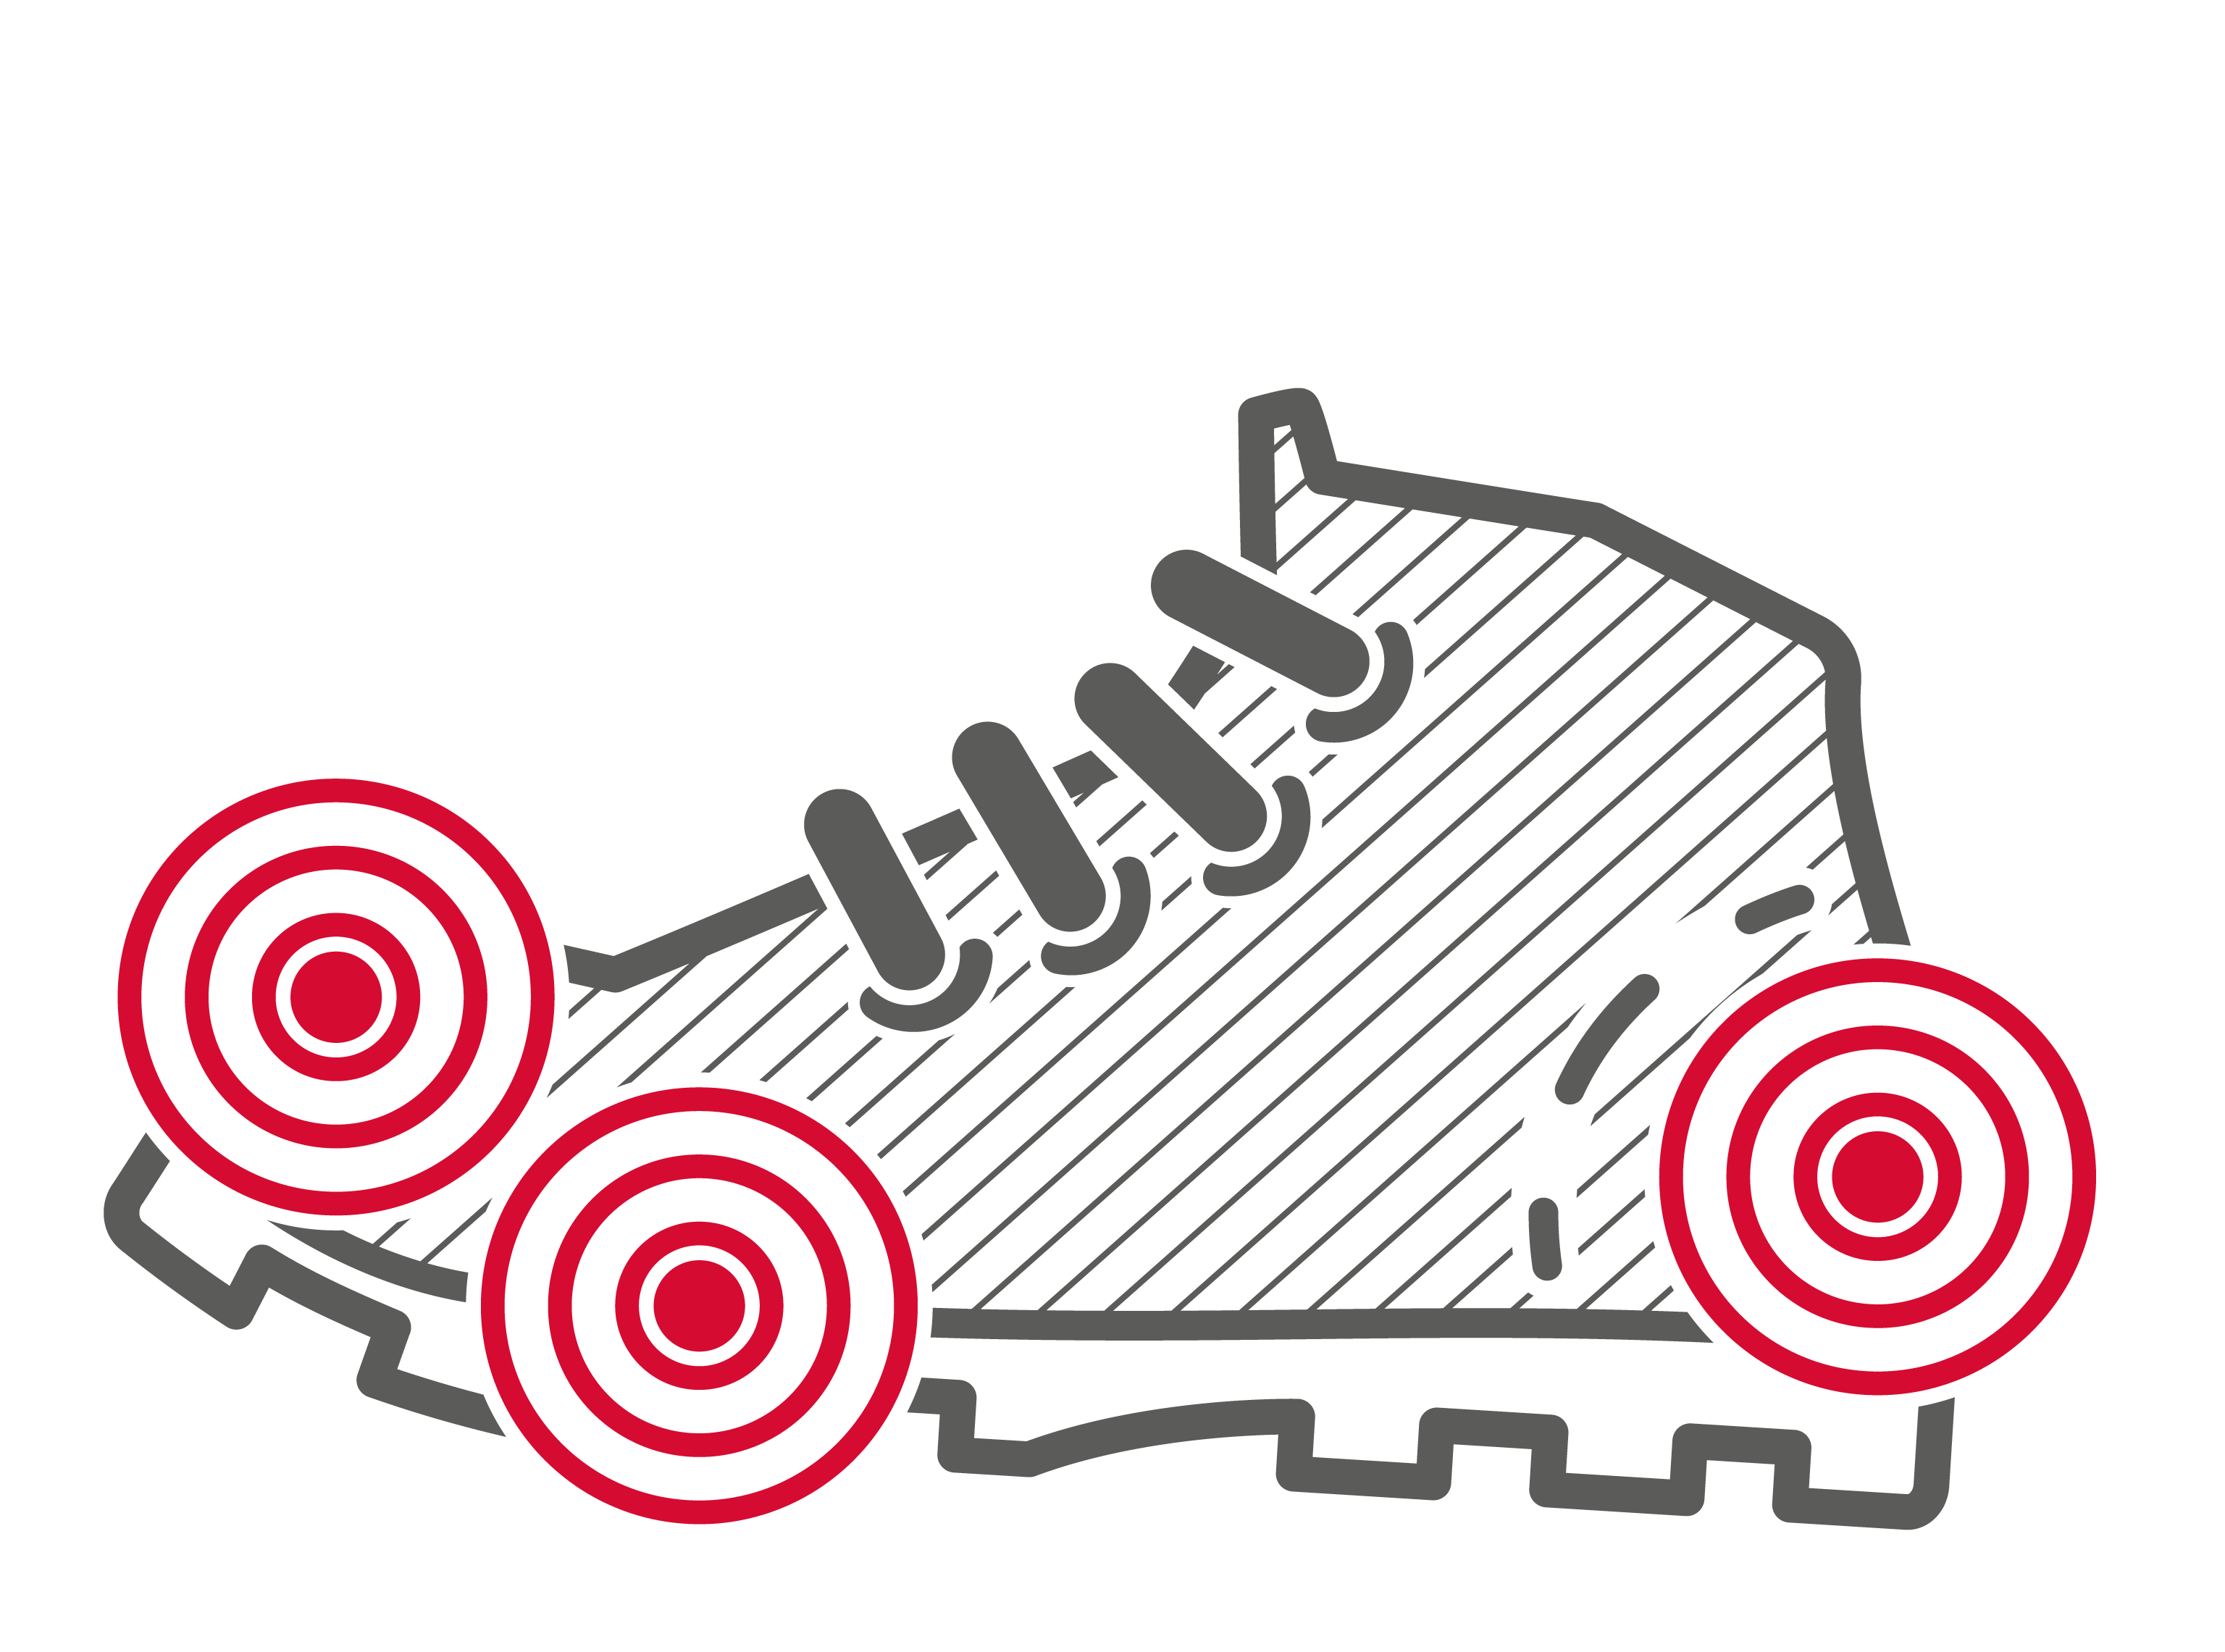
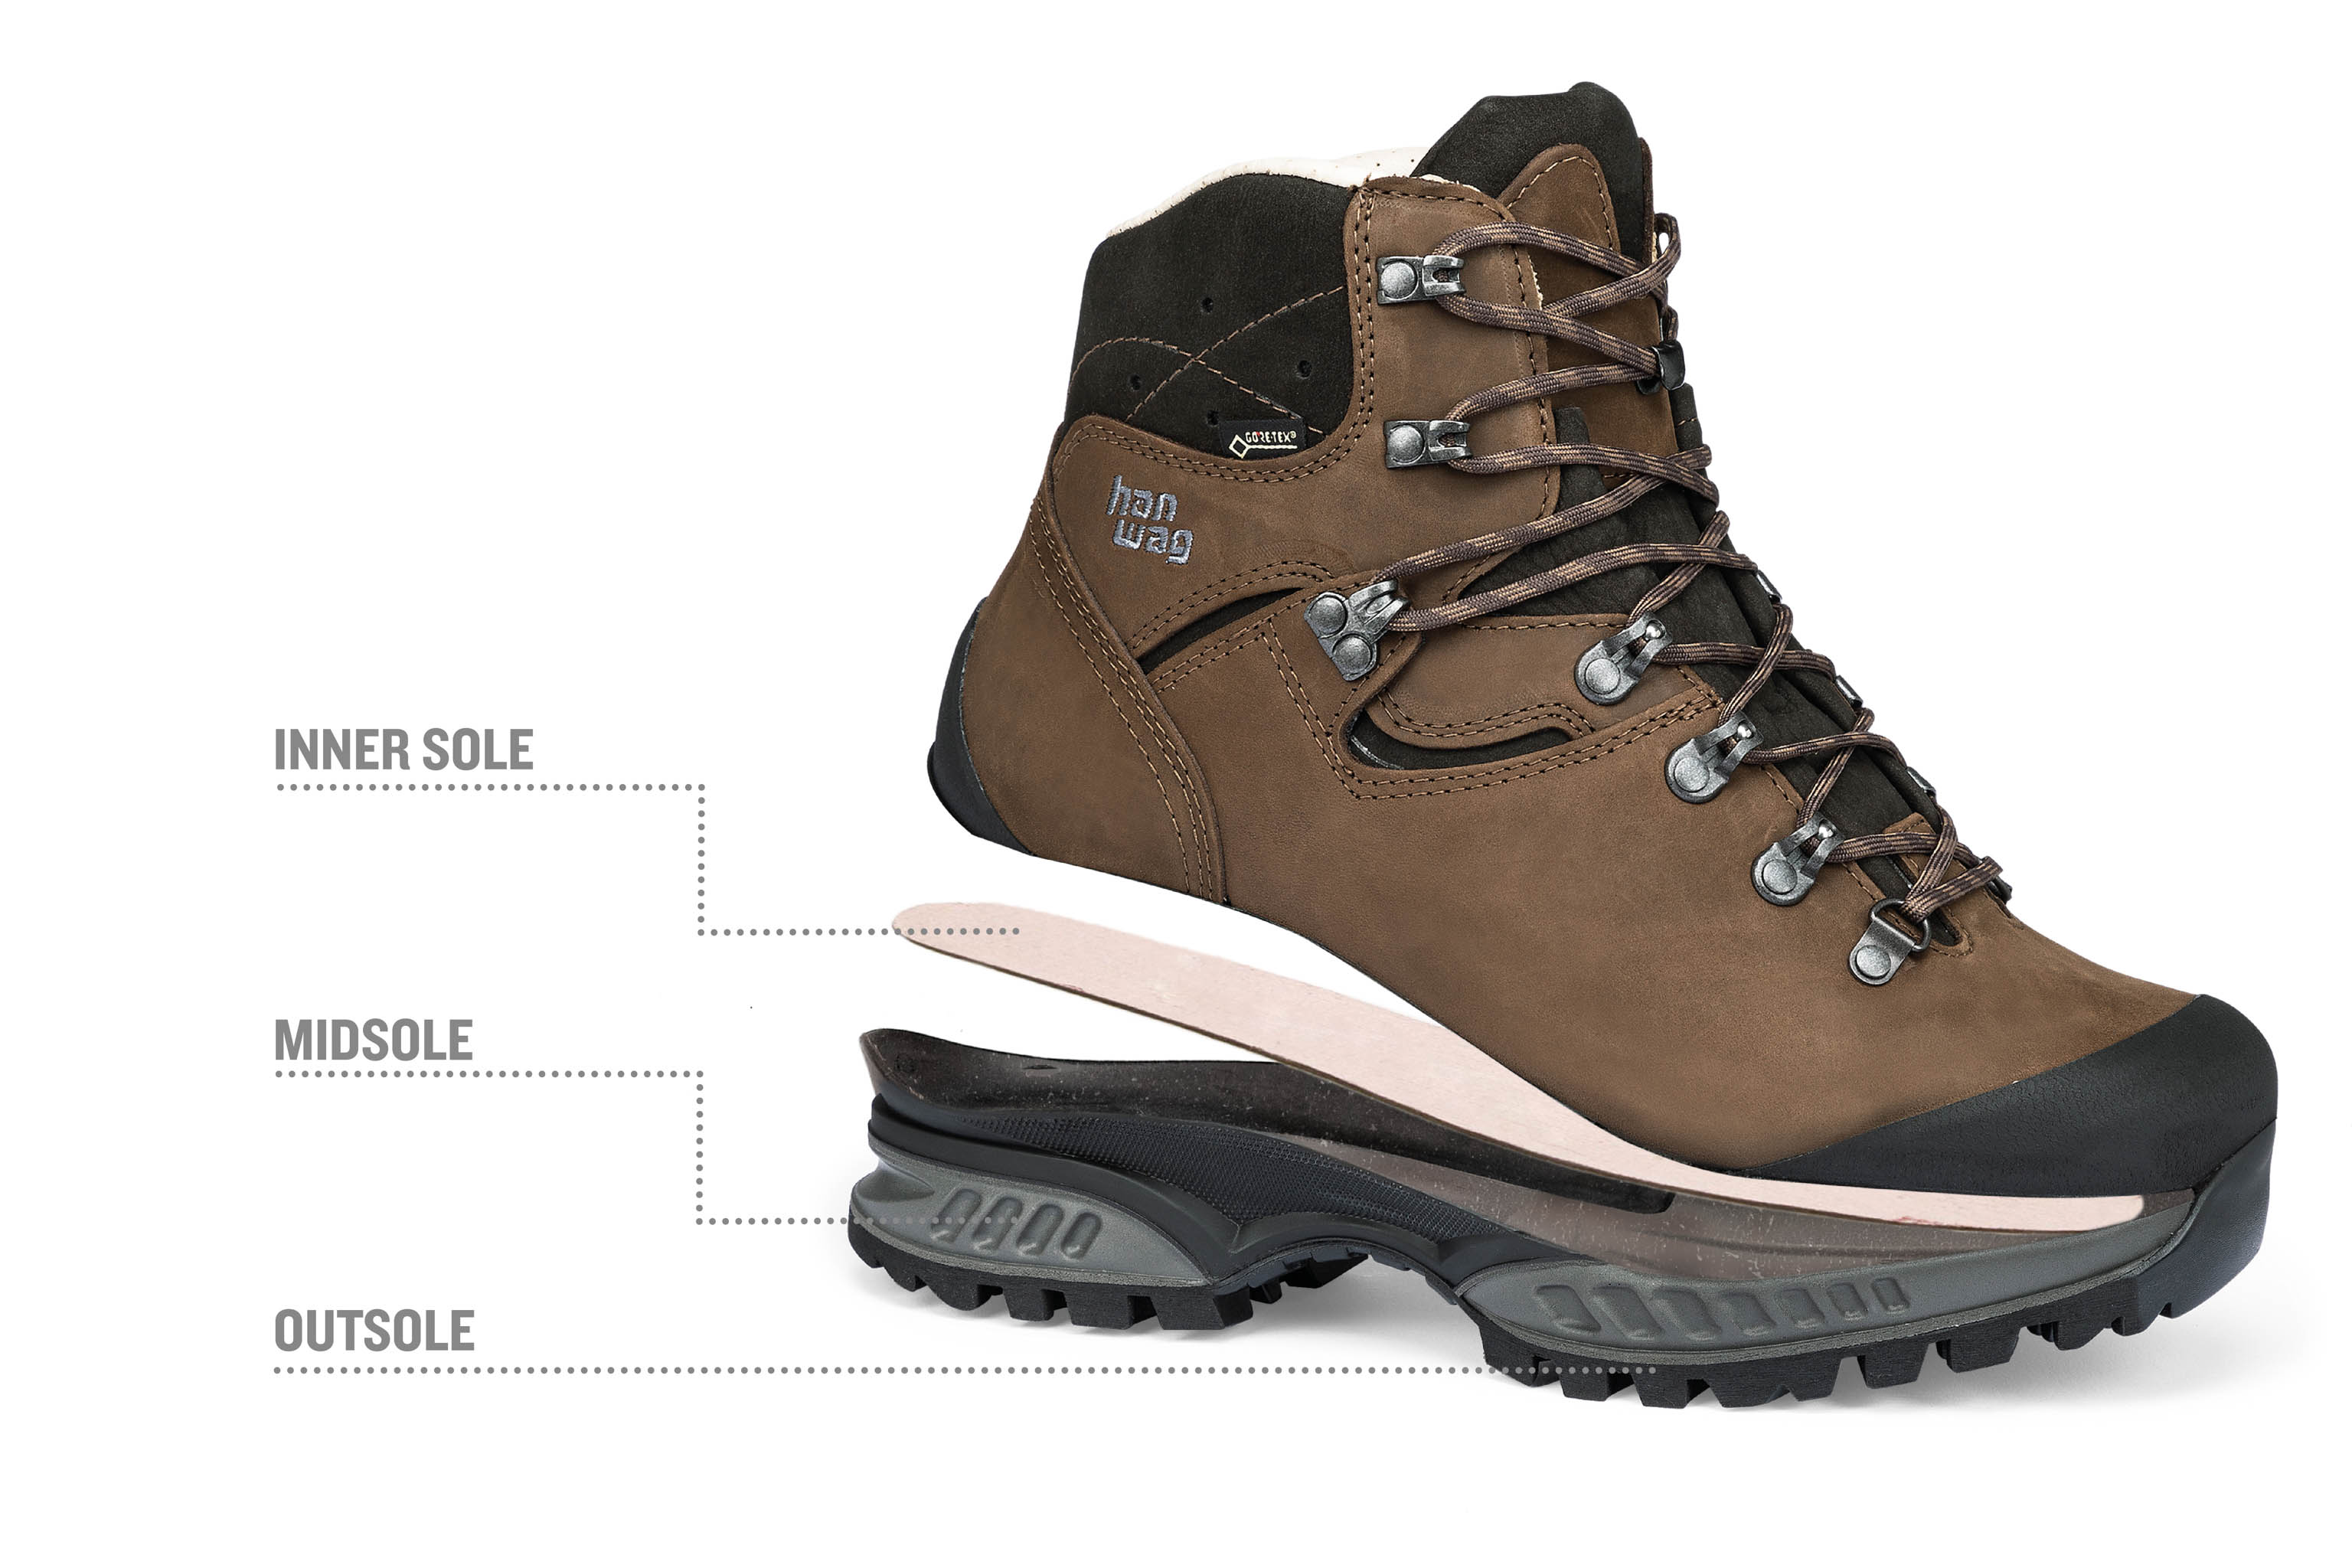
The problem lies with the midsole. As the name suggests, the midsole is the component in the middle of a boot between the rubber sole tread and central part of the shoe (the technical name for it is the insole). (–> Find out more here: All about hiking shoe grip) The midsole is there to cushion your feet, step by step and provide long-lasting comfort. Most hiking boot manufacturers use the plastic material polyurethane (PU) to make their midsoles because of its very good mechanical shock absorbency.
As with most materials, moisture can find its way into PU over time. It only takes a small amount of moisture to trigger the chemical breakdown of a compound – known as hydrolysis. During this naturally-occurring ageing process the chemical reaction starts to break down the plastic and it can become porous.
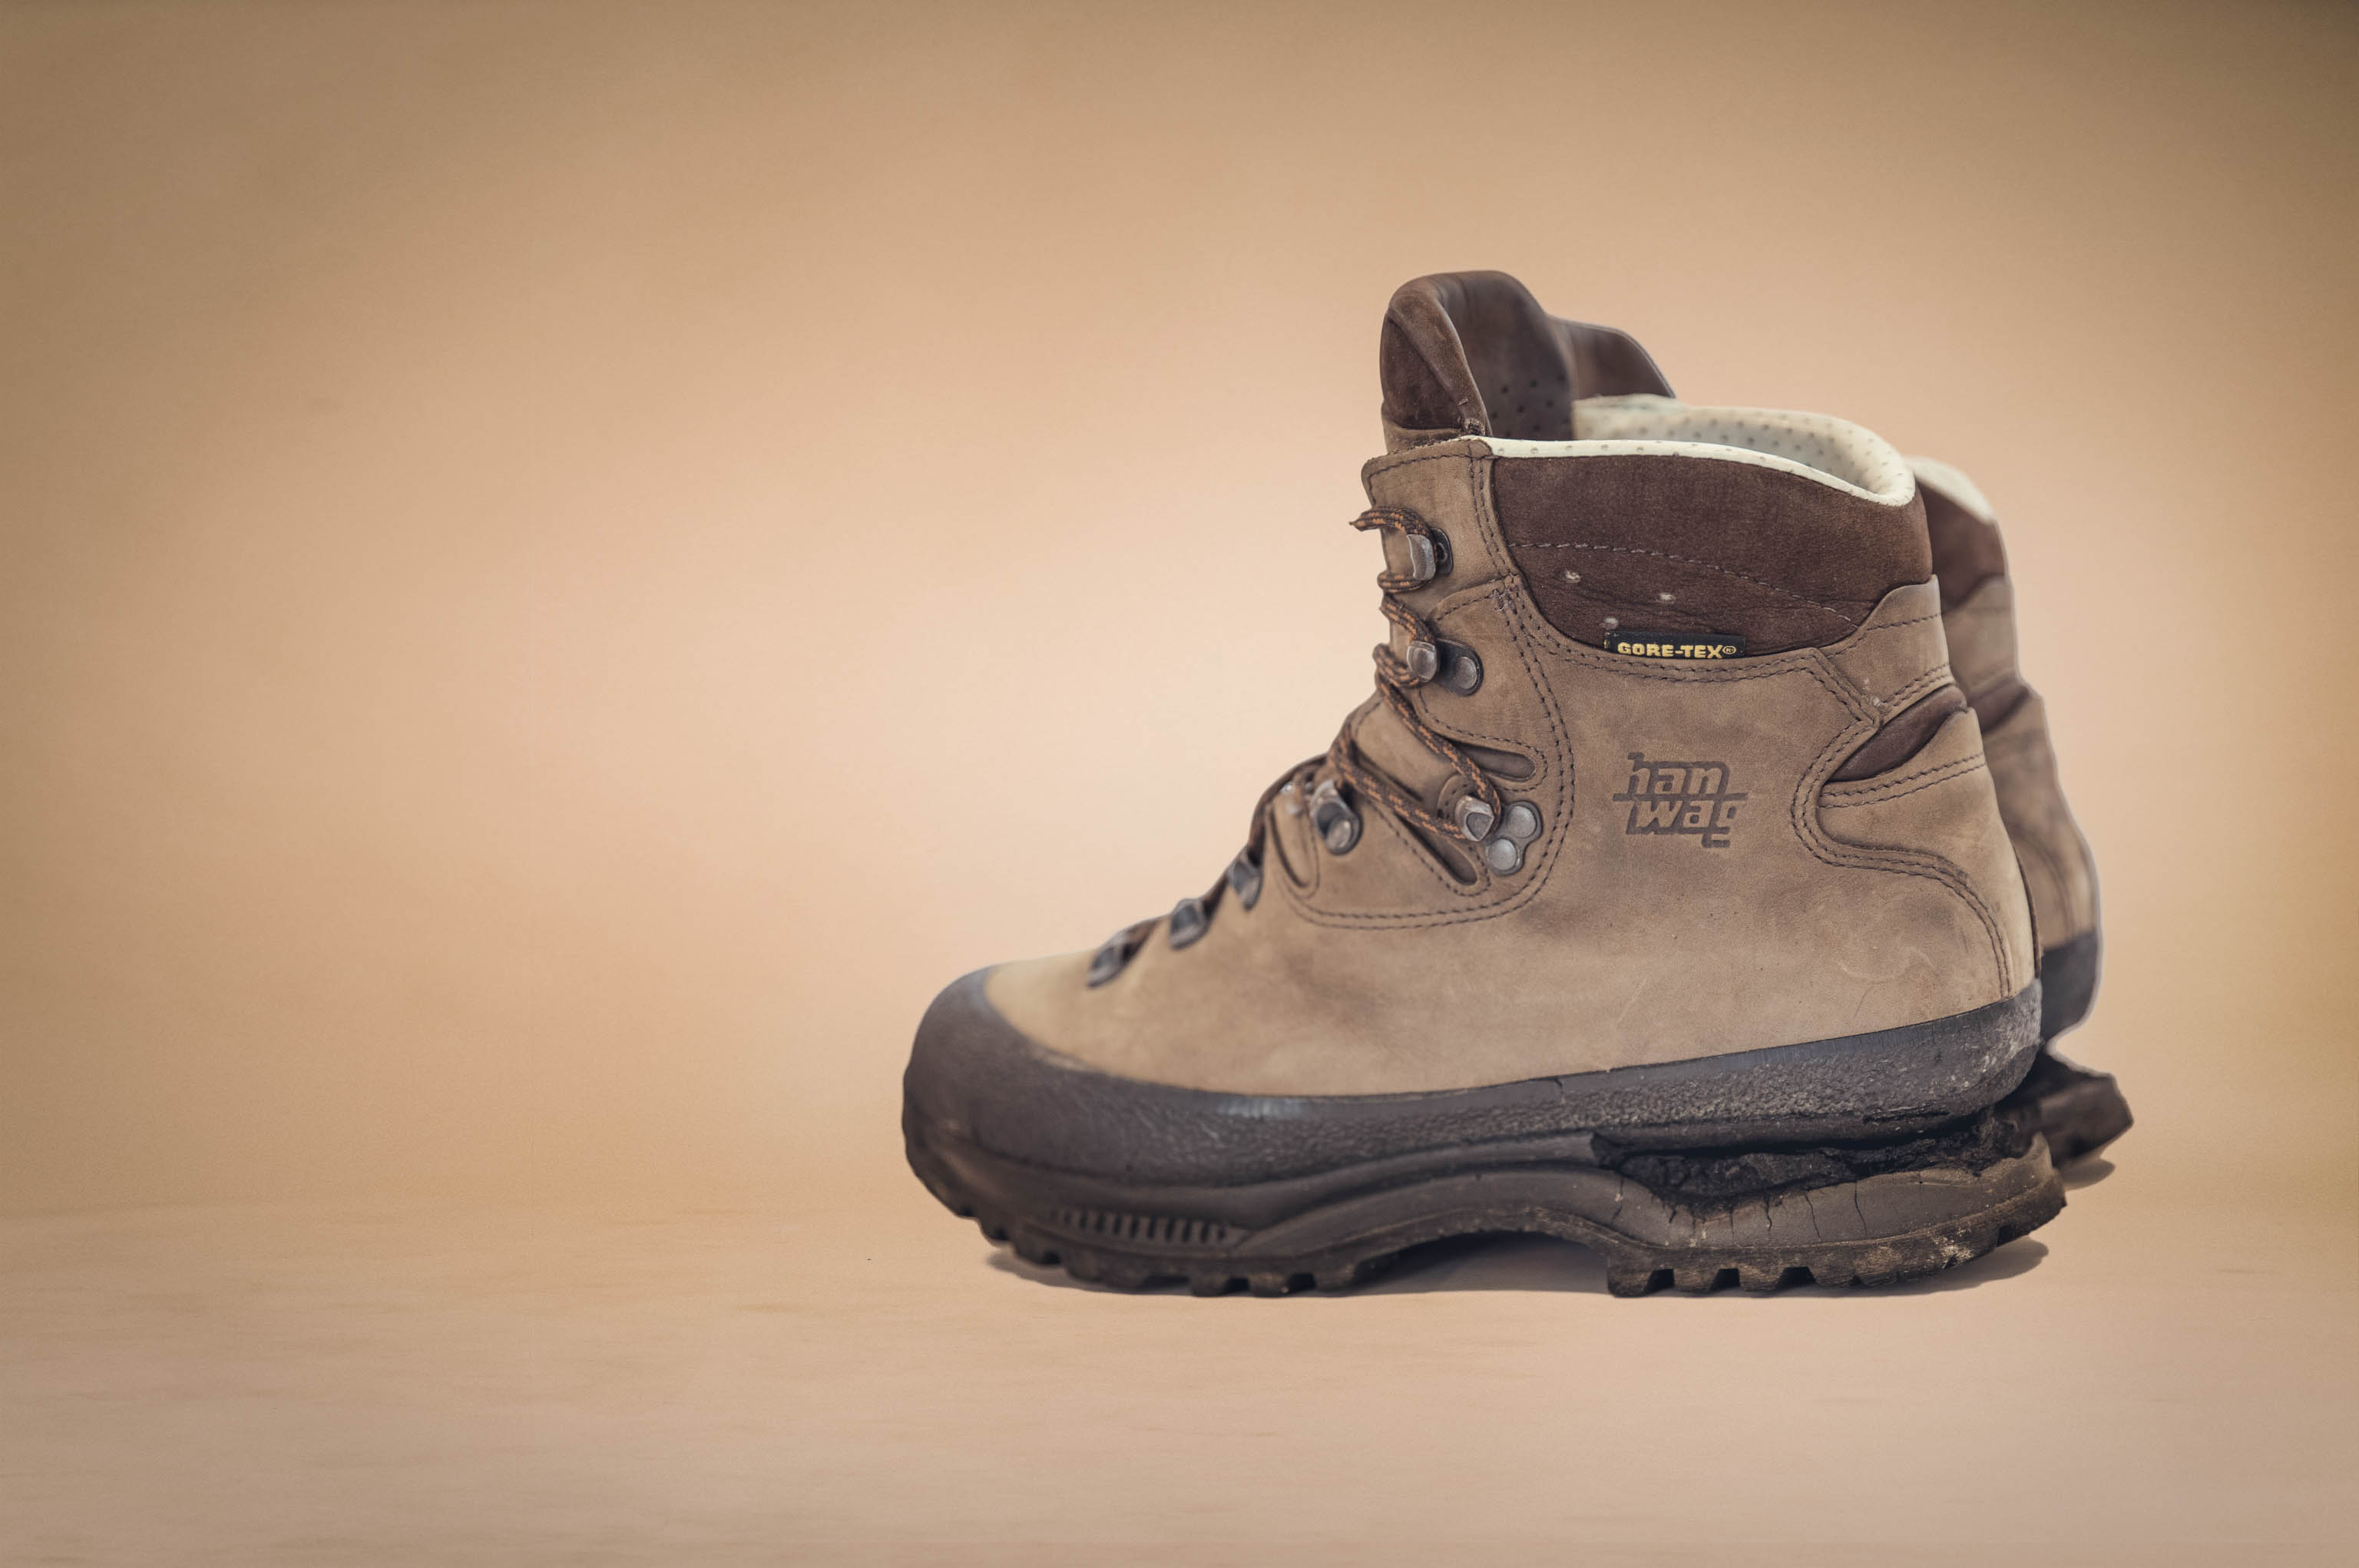
Further factors, such as hot temperatures and the UV rays in sunlight can accelerate the process. As a result, the polyurethane gets harder, more porous and, at some point, starts to crumble. In extreme cases, it can disintegrate completely. If you go hiking in boots that are already damaged by hydrolysis, then the rubber outsole can separate from the midsole, and the sole can come off your boots.
“Hydrolysis is not a material defect or a manufacturing defect.”
Pirmasens Test and Research Institute (PFI) Germany“Hydrolysis is not a material defect or a manufacturing defect,” explain the experts from the Pirmasens Test and Research Institute (PFI) Germany. If the hiking boot soles start coming off, this is a result of the natural ageing process, as is regularly seen in other plastic or rubber materials (e.g. car tyres), they claim.
Tip: After about six years, you should have the soles of your hiking boots inspected by the manufacturer or a specialist retailer.
Time is an important factor: Hydrolysis does not affect new boots, it only occurs in older footwear. Just how old exactly? Well, in our experience, the ageing process can start to show around six to seven years after a midsole was produced.
We recommend that you get your hiking boots inspected by the manufacturer or a specialist retailer after about six years. They will be able to assess the condition of the soles and, if necessary, arrange for them to be resoled.
There’s not much you can do to stop the march of time. However, there are two further important factors that you can influence using simple measures.
2 How can you prevent sole separation?
In addition to ageing, there are two further important factors: storing your boots properly and using your boots regularly.
Hydrolysis can also be caused by not storing boots properly. If you don’t store your hiking boots properly, then you could be making it easier for moisture to get into the midsole. Heat can also accelerate the rate at which PU decomposes. This is why you should store your hiking boots in a dry, well-aired place. Make sure that it is not too warm (i.e. not near a hot fire). And after using them, make sure that you dry them carefully before you store them in the cellar or shoe cupboard. (–> How to clean and dry hiking boots properly)
Tip: Using your hiking boots regularly helps to prevent material ageing.
The third factor is movement. You see, it’s not frequent use that causes PU to decompose. Quite the opposite. The less you use your hiking boots, the more likely the sole is to come off at some point. If they are not used, boots can start to deteriorate during storage. It’s not a question of using them or losing them, but boots that stand around unused are more likely to develop very fine cracks in the midsole material that allow moisture or other decomposition accelerators, such as UV light to penetrate. Whereas regular use and movement keeps the polyurethane flexible and prevents microcracks from forming.

3 How to recognise hydrolysis
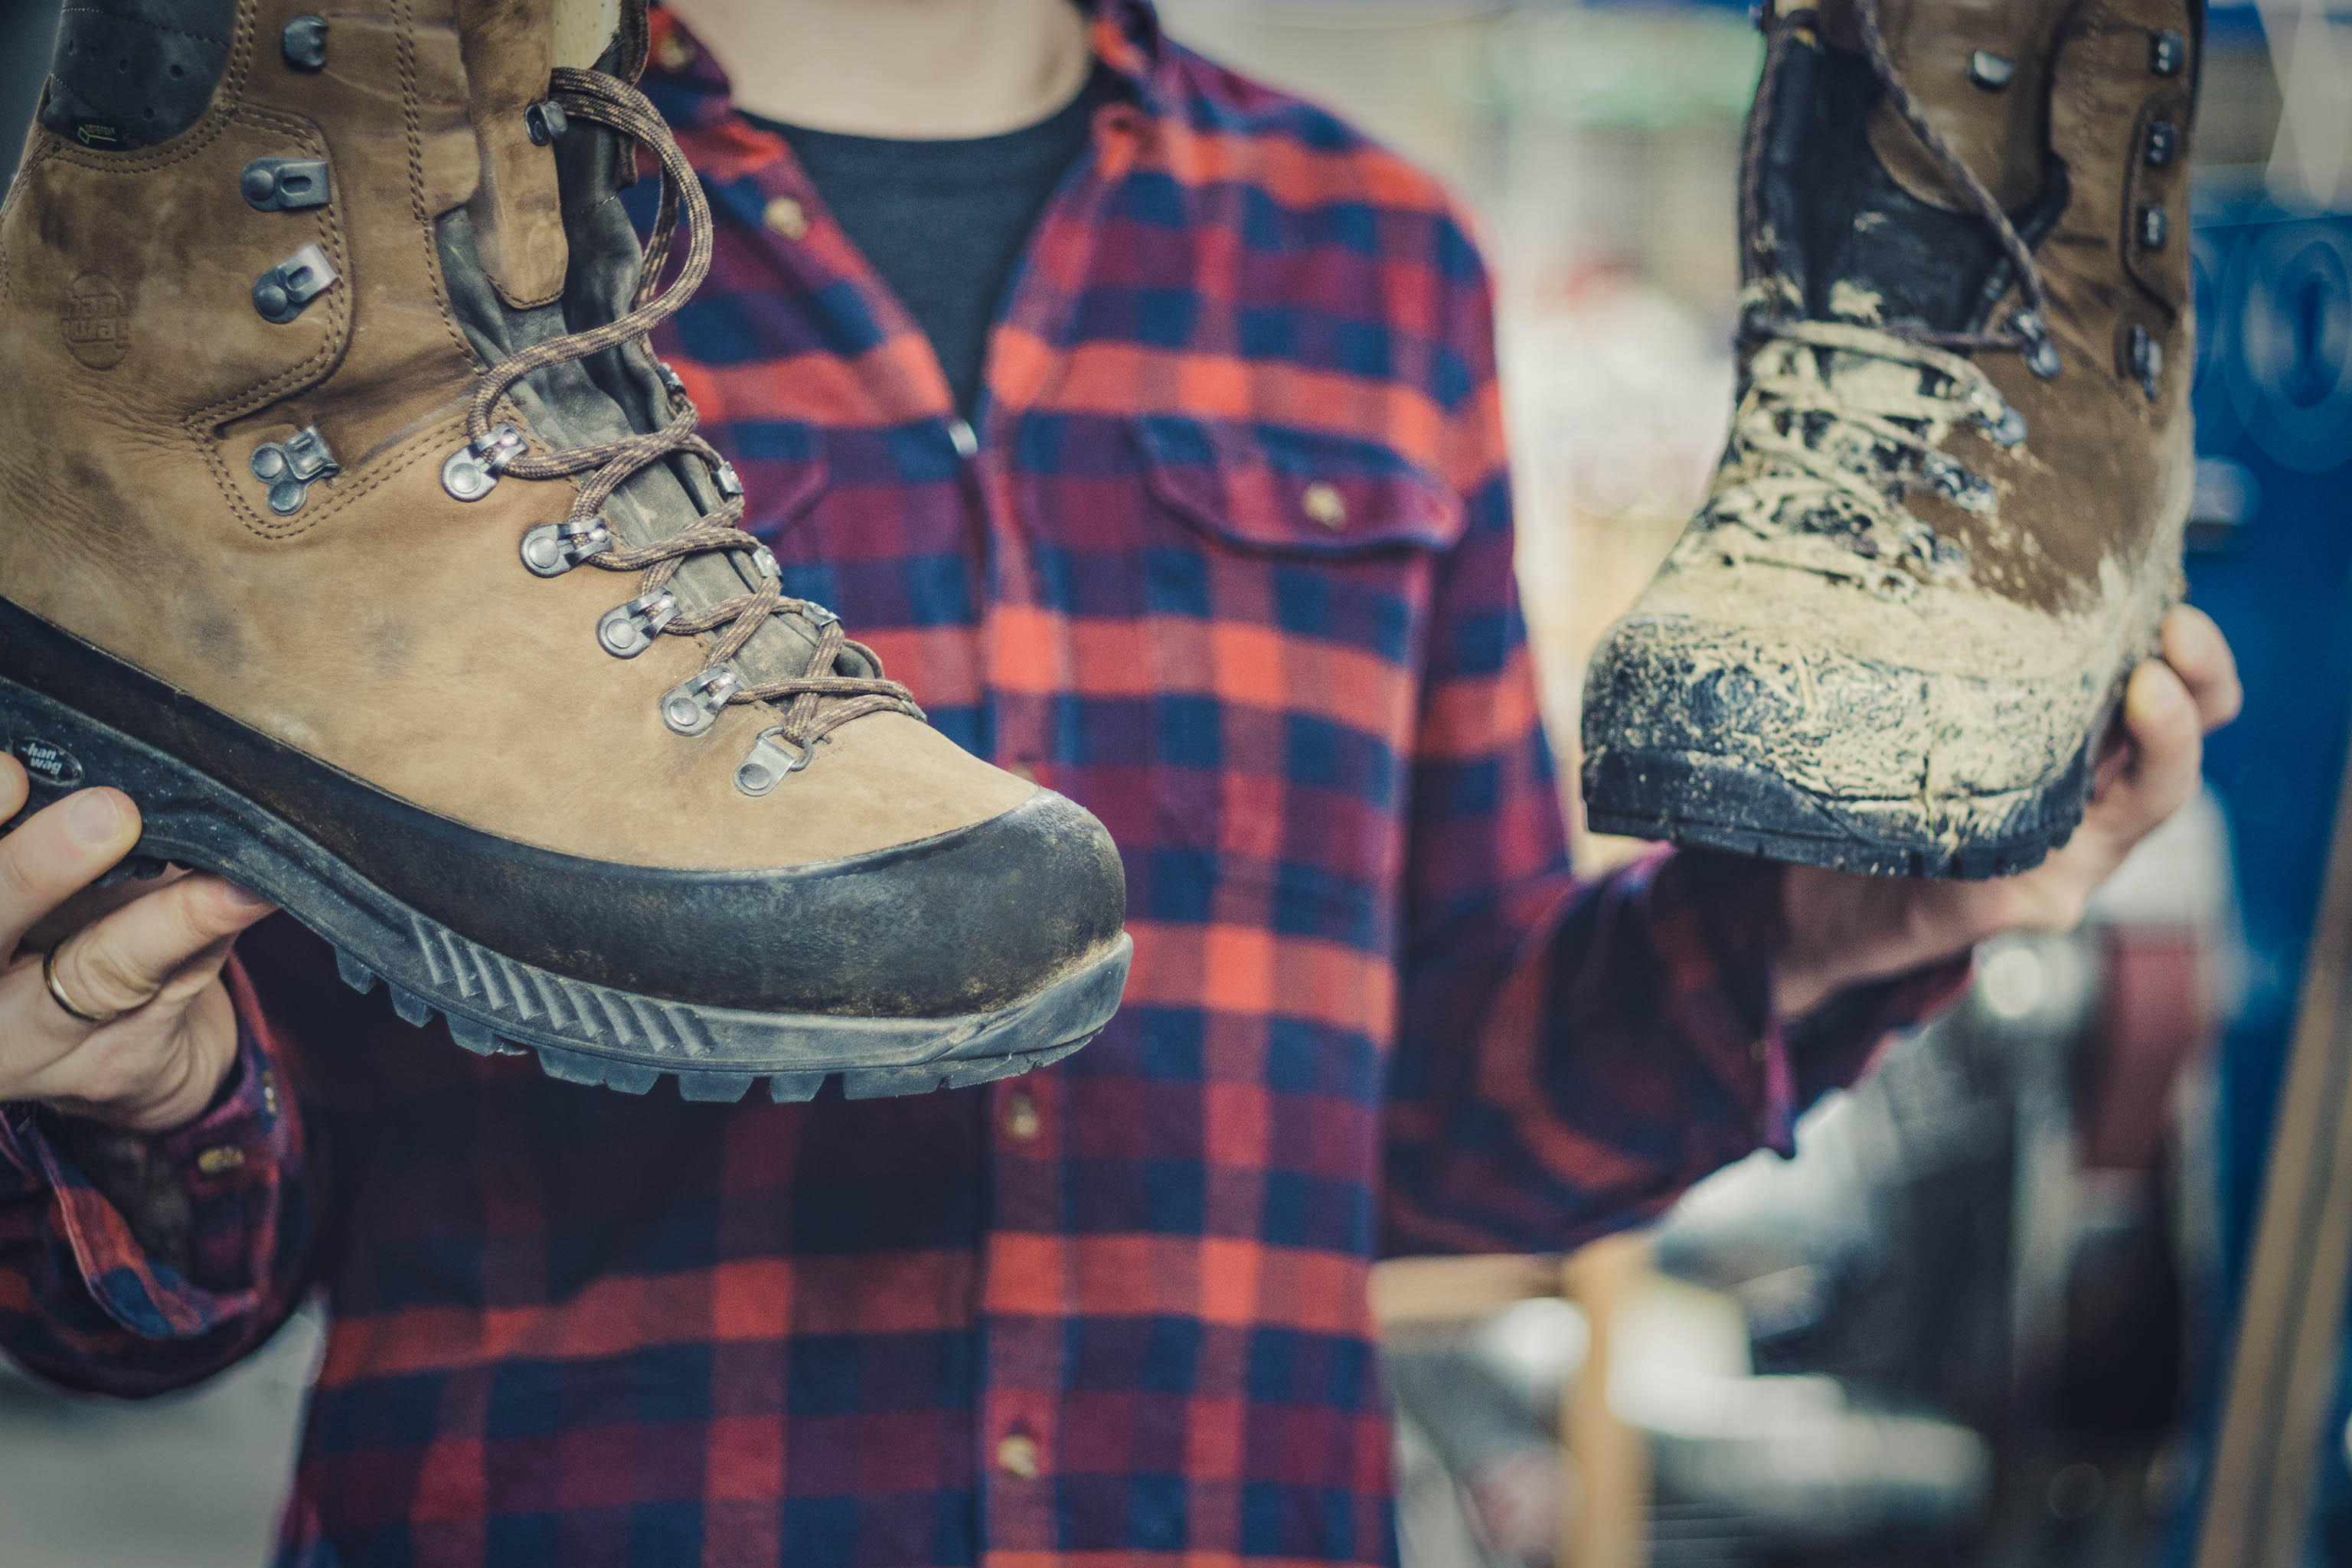
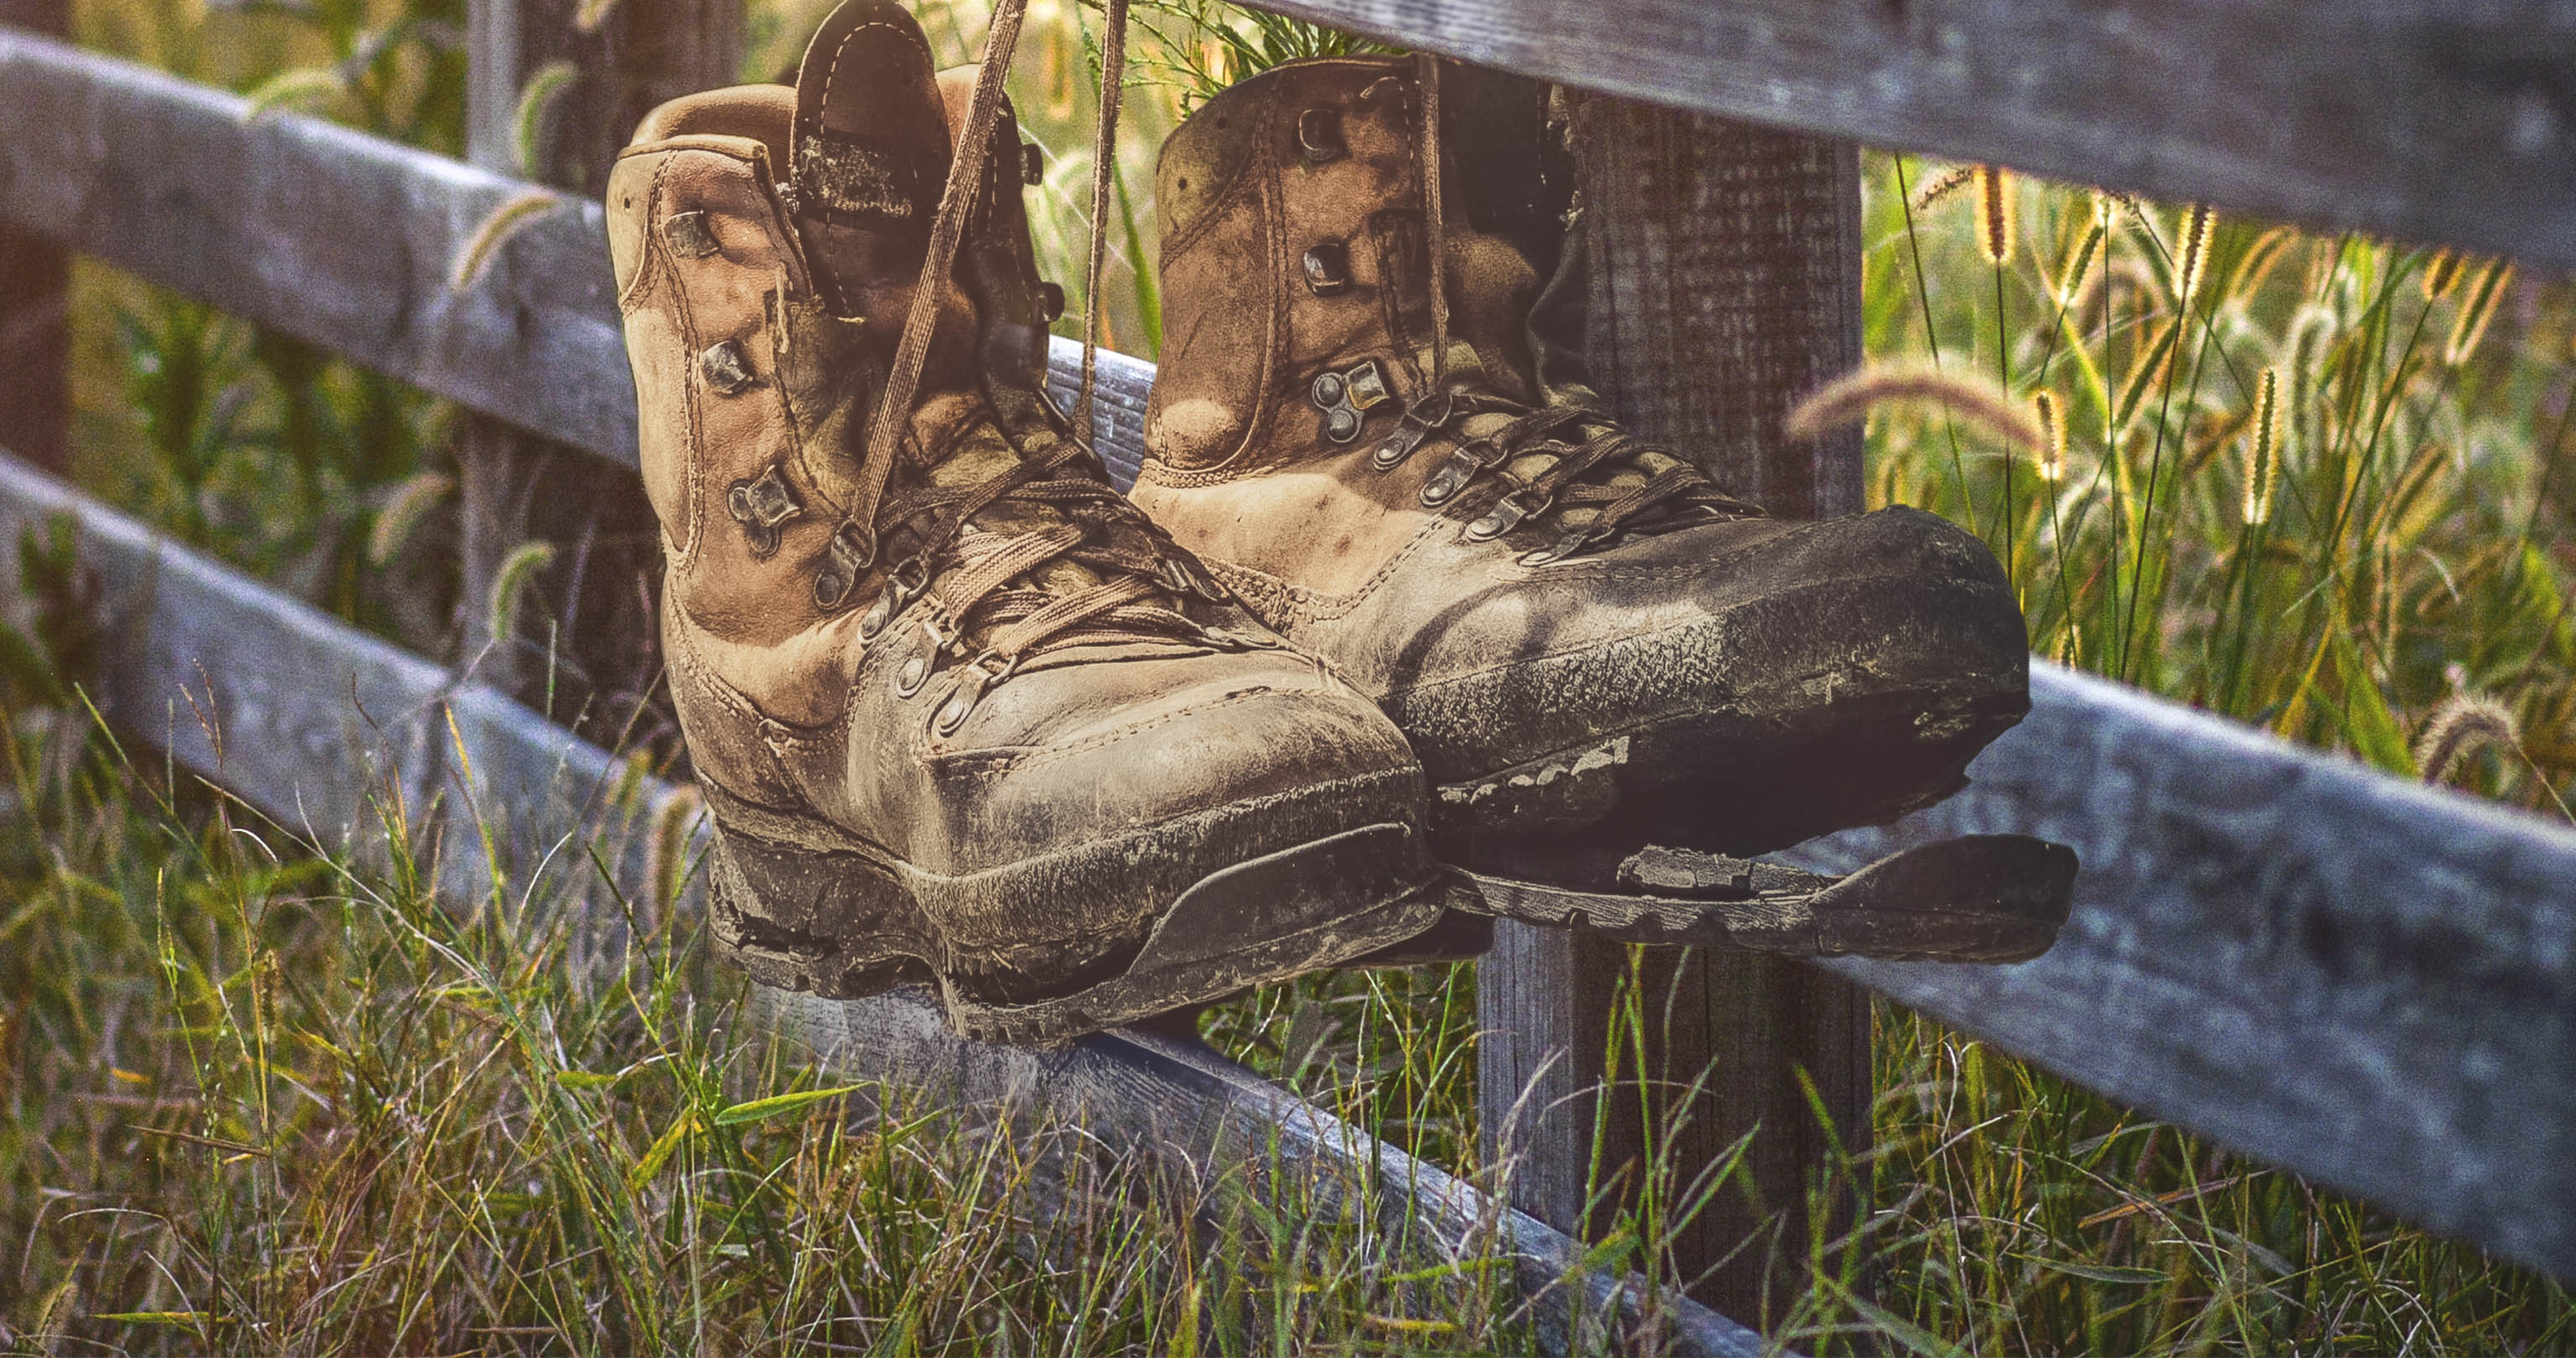
The initial tiny cracks are too small to see. The process of hydrolysis takes place inside the midsole – and can hardly be seen from the outside.
Nevertheless, you should take a close look at your boots from time to time, especially if they have not been used for a while. If you can see signs that the midsole is disintegrating or coming away, then the process is already at an advanced stage and you should not use your boots for hiking in this condition.
Tip: If your boots have been standing around for years, test them to see if the soles still hold.
The next thing to do is a pressure test. Press a pointy object, but not a sharp object, (e.g. a key) using moderate force into the midsole, such as by the heel wedge. The plastic should give slightly, otherwise it’s hardened. The material should rebound around the point where it was compressed. This demonstrates that the sole is still elastic.
The following tip is even more important than the pressure test. If your hiking boots have been standing around for a long time (or maybe even years), then test them out in everyday use, to check that the sole is still fine. It’s better for the sole to come off during a walk in your local neighbourhood, than somewhere in the mountains or in remote backcountry wilderness. Especially given that there is not much you can do to repair it en route.
4 Emergency repairs on the move
Imagine your shoe sole came off, while you were on a hiking trip. Maybe somewhere in the backcountry or in the mountains? What can you do to make it to the next hut or to get back safe and sound down into the valley?
There is no emergency number to call. And although there have been discussions on the net about hiking boot sole separation and how to glue soles back on, few hikers carry a tube of glue in their pack. And if your sole does come off, not even the best shoe glue in the world would be able to stick together a crumbling midsole.
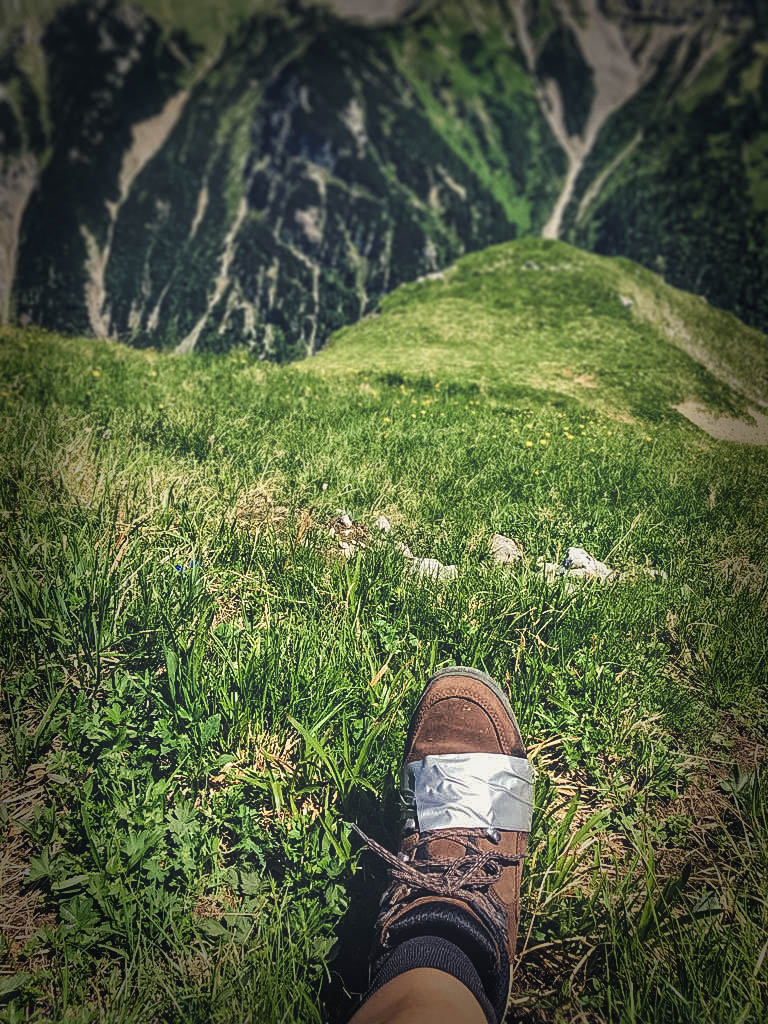
Sanna Wandtke is an experienced long-distance hiker and one of the HANWAG Sole People. She reports: “When I was hiking the Pacific Crest Trail, a friend of mine had to deal with the soles coming off her boots. The only thing that helped was duct tape. We wrapped the tape around the front of her boot to hold the sole in place. This works as a temporary fix and will get you back to civilization.”

“The only thing you can really do to fix your sole in an emergency is to use duct tape. When I’m on a long-distance hike, I always make sure I keep some wrapped around my trekking poles. This way I’m prepared in case of an emergency.”
Sanna Wandtke, long-distance hikerIf you’re on a day hike, you might be able to borrow some tape from a friendly mountain hut or at a cable car. This should see you back home. Then it’s high time to think about getting your boots resoled.
5 Resoling hiking boots
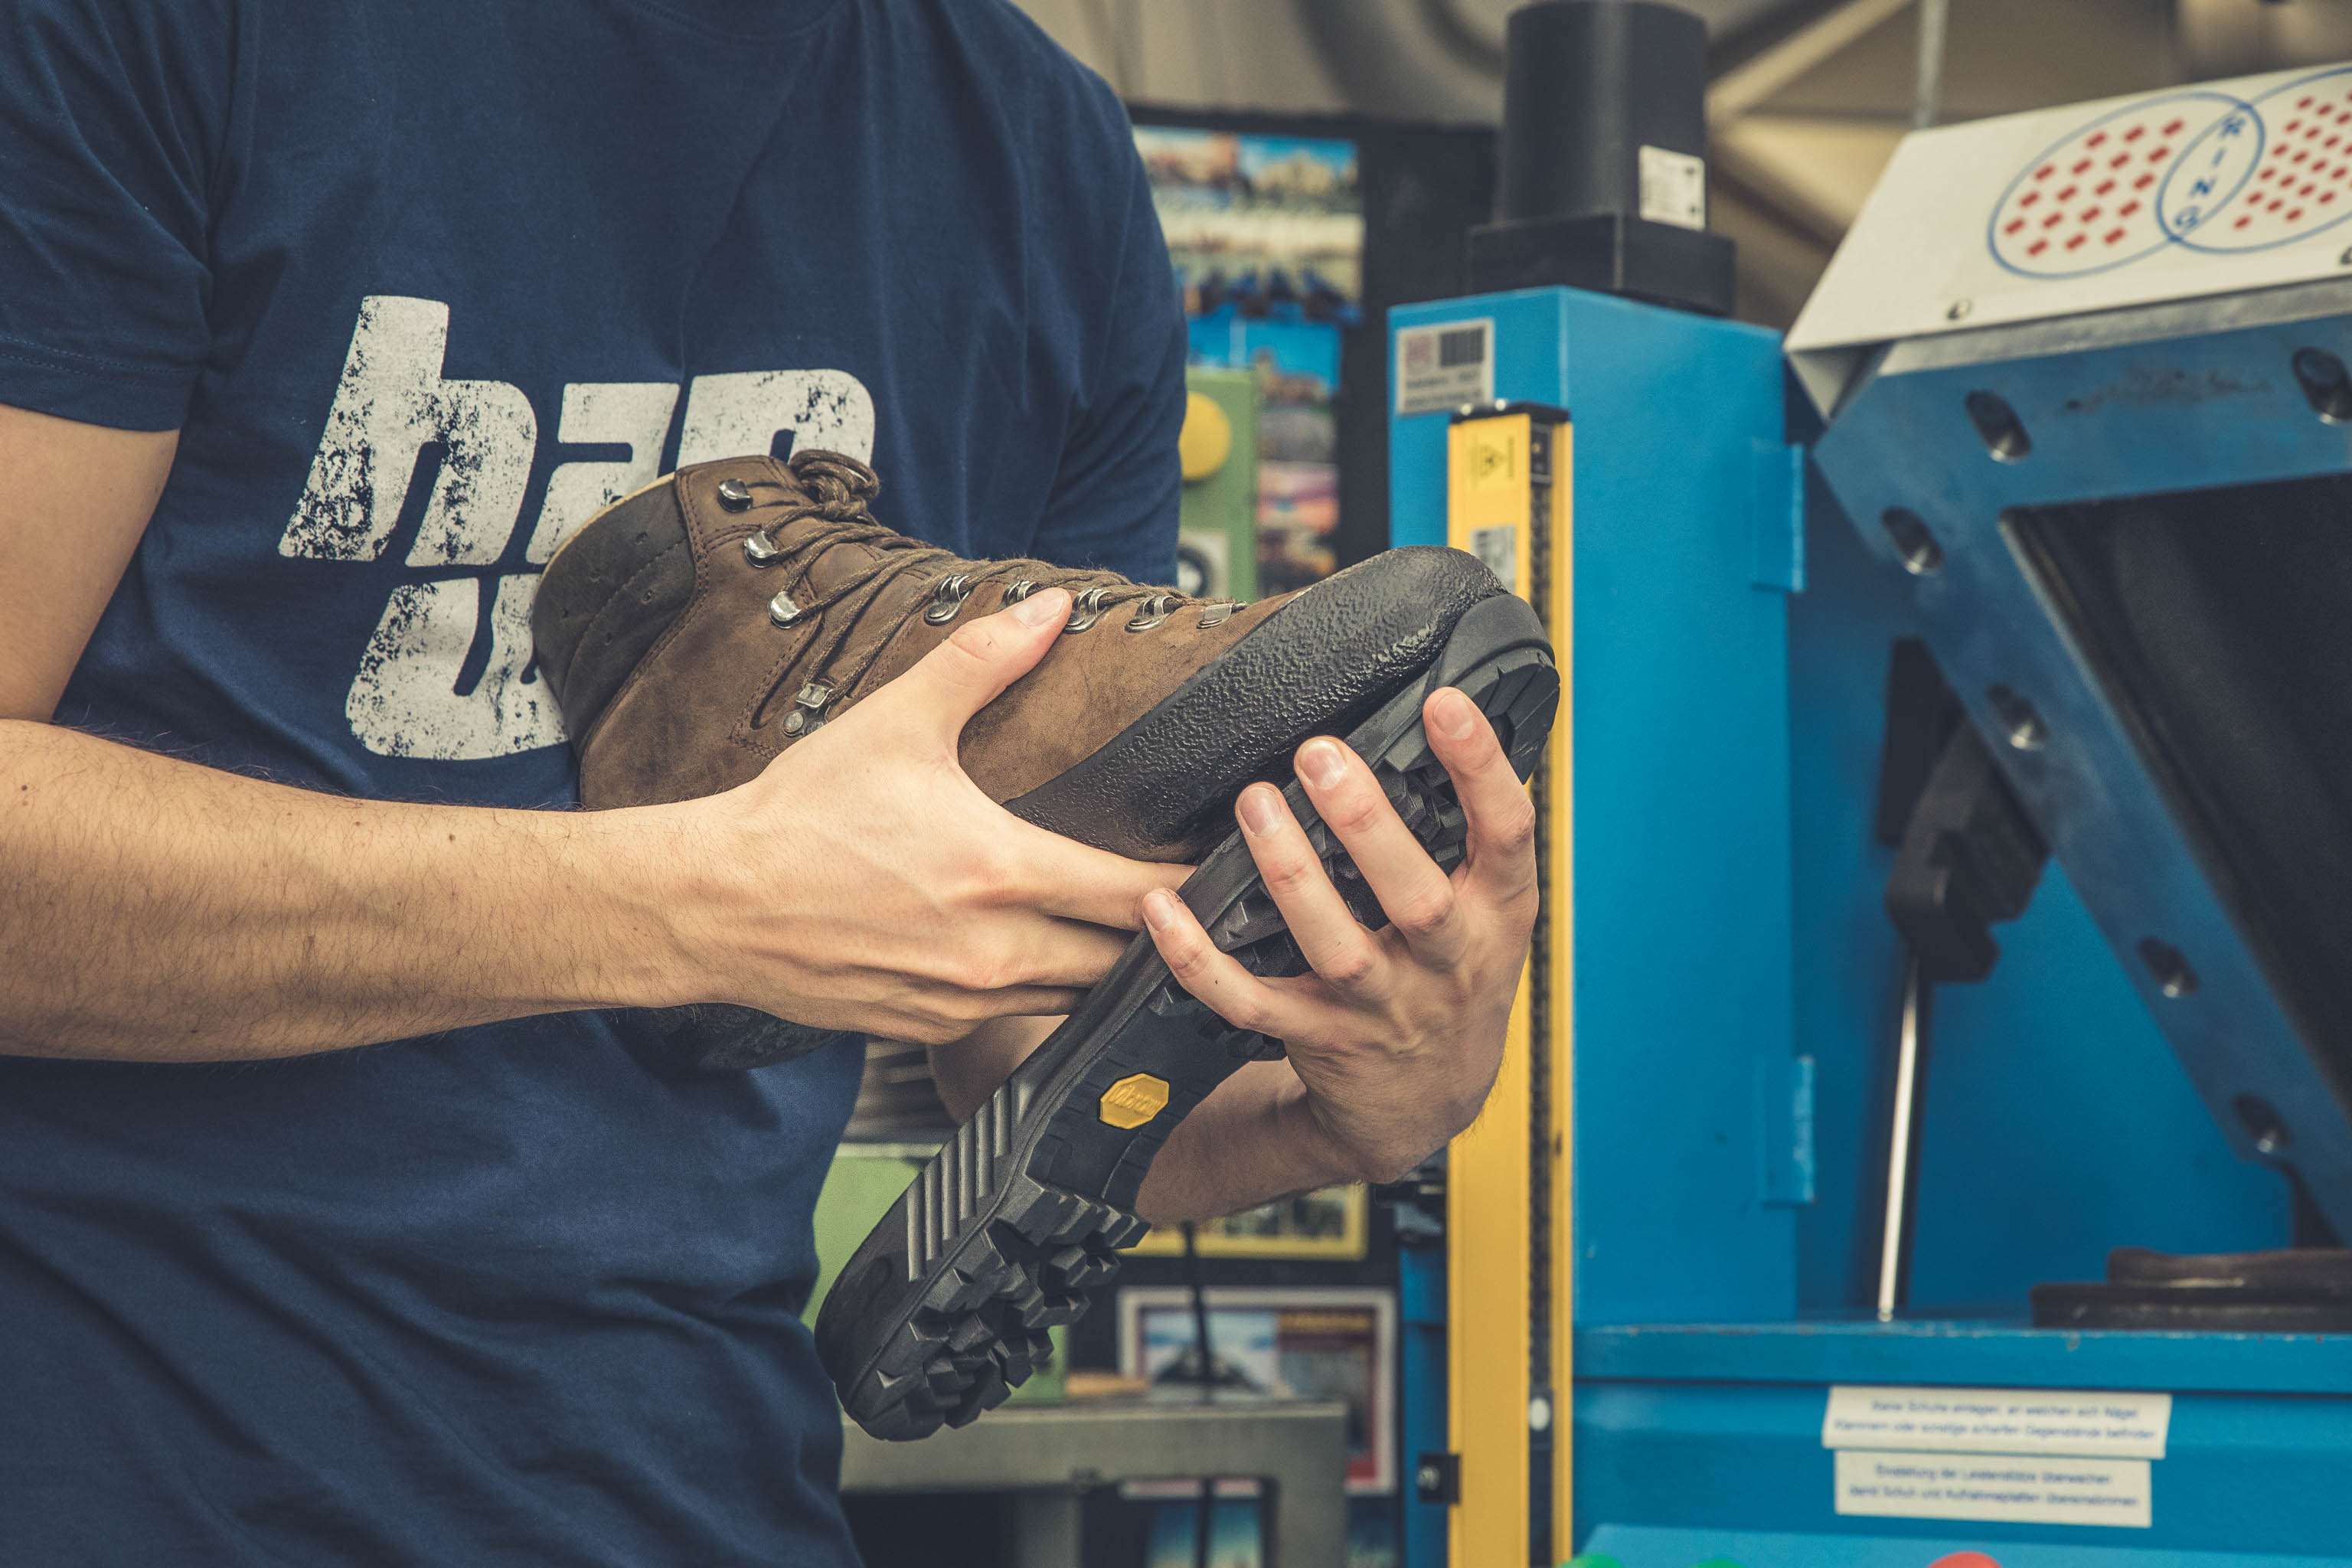
High-quality hiking boots are generally made with a so-called cemented construction – or they are double stitched. At HANWAG, we use these techniques for most of our models. (–> How HANWAG boots are made) Both of these constructions have a major advantage: they are fully resoleable. In most cases, the upper is still in good condition even if the sole is worn out. This means that you can keep on hiking in your trusty, familiar boots for many years to come – and it’s more sustainable too.
If your HANWAG shoe soles came off due to hydrolysis, we can resole them for you. To do this, we remove the old outsole and the midsole and replace them with new parts. Your resoled hiking boots will be as good as new – only they will be perfectly worn in already.
To have your boots resoled, please contact your specialist HANWAG retailer. (–> Find your local HANWAG retailer) They will then inspect them and send them on to us for repair. They will also be able to give you an idea of the costs involved. That will depend, among other things, on which type of footwear you have. Unfortunately, it’s not possible to send boots directly to us at Vierkirchen.
For more information about resoling, check out the HANWAG services
Watch the Video: How resoling works (English subtitles available)

Ingo Wilhelm
You’ll find him hiking, mountain biking or ski touring. Mainly in the Alps. Favourite destination: Iceland.